I’ve long been considering switching to a different keyboard layout. I tend to type with mostly my forefinger and middle finger, only using my ring and pinky fingers occasionally to stretch out to the modifier keys. Despite this, I still manage to type at around 120WPM on a staggered QWERTY keyboard.
Thinking back, I probably started teaching myself to type at a reasonable speed around age 10. I’m now in my mid-twenties. My typing technique (or lack thereof) never really bothered me, but 15 years of typing with poor technique has started to take its toll. Recently I’ve started experiencing hand fatigue, and I’m beginning to see early signs of RSI. So I figure now is the perfect time to make some changes to the way I type.
My first idea was to start using an ergonomic keyboard. The three keyboards which seemed to be most popular at the time were the Microsoft Natural Ergonomic, the Truly Ergonomic, and the soon-to-be-released Matias Ergo Pro. After trying some keyboards out, I realised that if I was going to do this properly, I would need a split-hand keyboard. This is mostly due to having quite broad shoulders, which means that when my hands are close together (like on a keyboard), my shoulders need to be bunched up in order for my hands to take the correct position. This can be quite uncomfortable, and I often find myself stretching and cracking my shoulders throughout the day.
The Ergo Pro is the only one of the keyboards I was evaluating which had a split-hand design. Unfortunately it didn’t take long for me to realise that despite the split-hand design, the Ergo Pro wasn’t suitable either. A lot of the pain I get in my hands is due to over-stretching the ring and pinky fingers. The Ergo Pro still follows a fairly standard keyboard layout, which places the modifier keys in a position where you must reach your pinkies out in order to hit them.
For a while, I was defeated.
Then, I stumbled across the ErgoDox. At a glance, this looked like the perfect keyboard for me. The split-hand design would relieve the tension from my shoulders, the thumb keys would reduce the need to stretch my pinkies to reach the modifier keys, and the non-staggered layout would help reduce the distance my fingers need to travel when changing rows. The fact that the keyboard is fully programmable with open-source firmware was what finally sold me.
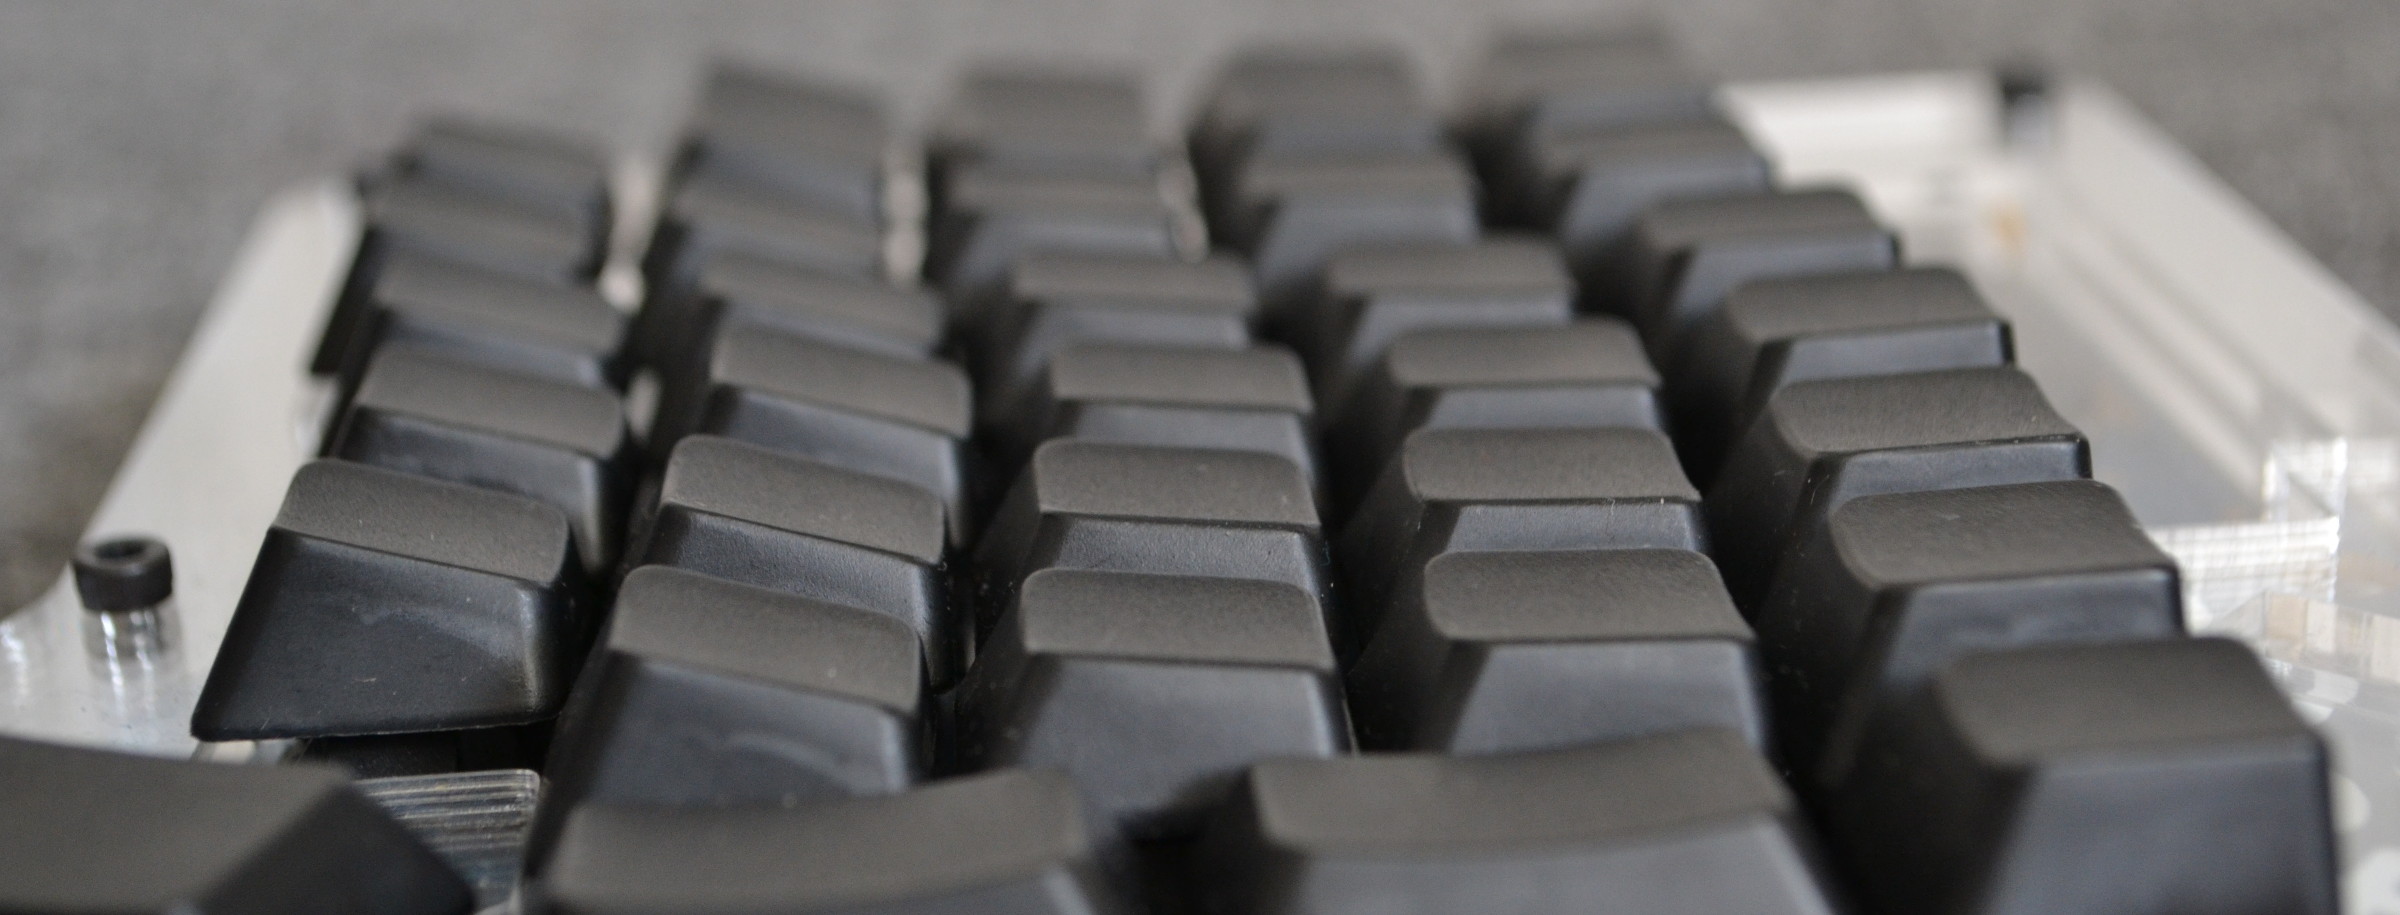
So I ordered myself an ErgoDox kit from Massdrop, and set around to building my keyboard.
I built the keyboard in short bursts when I had spare time on the weekends. All up I probably invested about 10 hours over a period of two months. I made good use of the electronics station at London Hackspace, and learned a lot about soldering and about electronics in general. I’m fairly confident that I could build another ErgoDox in a matter of hours.

While the open-source firmware has several layouts available, Massdrop provides the binary firmware for a QWERTY layout to get you started. I didn’t particularly feel like learning a completely new keyboard layout so I stuck with QWERTY, figuring that the layout of the ErgoDox would solve the fatigue problems I was having. I was wrong.
Using the ErgoDox, I still felt like my fingers were moving just as much as on a regular keyboard. I used Patrick Gillespie’s amazing Keyboard Layout Analyzer to help me figure out what the problem was.
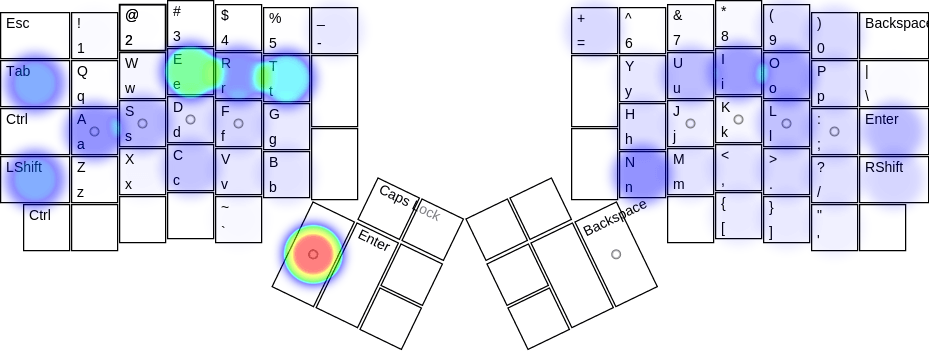
The heat map above shows how the QWERTY layout requires you to constantly move your fingers between rows. For me, this was a major cause of discomfort. I decided that I needed to find a more efficient keyboard layout.
Learning a new keyboard layout isn’t something you can take lightly. There’s a huge time investment required not only to learn the new layout, but to become proficient with it. For me, “proficient” means being able to type at least 100WPM – hopefully even more. So finding the “right” layout was a fairly daunting task.
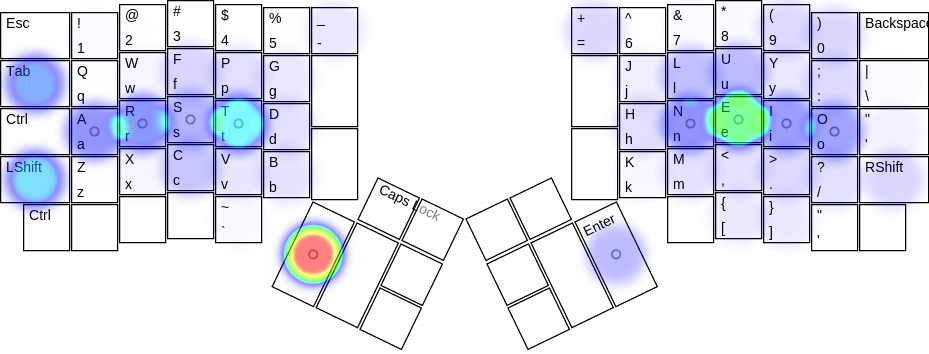
After some experimenting and reading others’ thoughts, I finally settled on Colemak. There were a few reasons for this:
- The layout scores highly in the layout analyser when analysing code (which I spend more time typing than English).
- The heat map shows reduced movement between rows.
- Keys used for common keyboard shortcuts (Q, W, Z, X, C, V) remain unchanged.
- It felt the most “natural” compared to other popular layouts like Workman, Dvorak, and Programmer Dvorak.
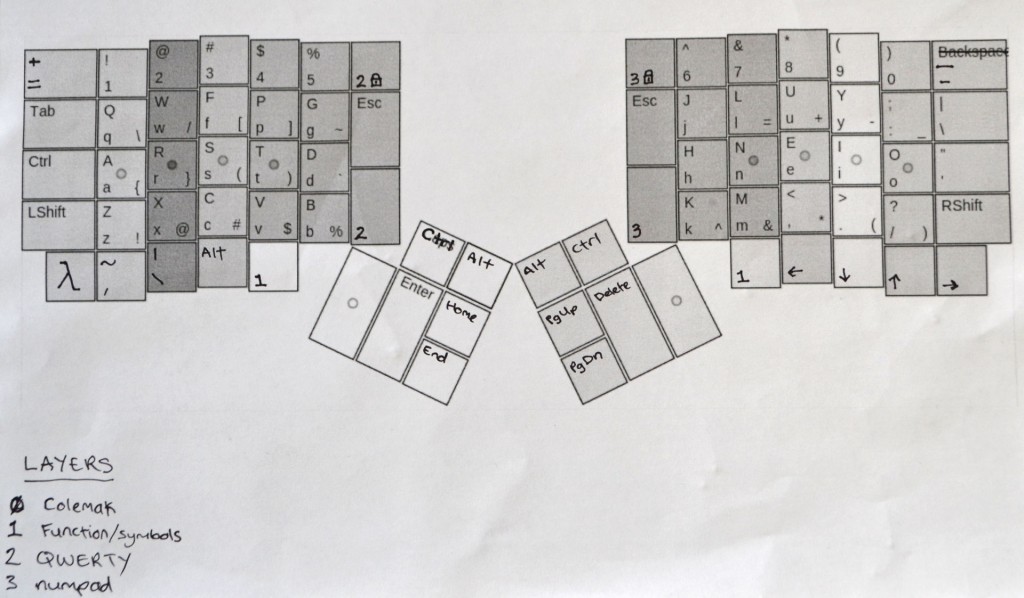
An article about Jason Trill’s experience with the ErgoDox convinced me at the last minute to use a modified version of Colemak which puts the symbols on a separate layer around the home row, so you don’t need to move your fingers to the top row to type symbols. In case you’re wondering what I mean by a “separate layer”: layers on a keyboard are a way to have one key type different characters. You actually use layers all the time, even if you don’t realise it. When you hold down the Shift key, you’re activating another layer on your keyboard. When you hit the Caps Lock key, you’re toggling that layer. Layers differ from key combinations (like Control + Alt + Delete) in that they’re implemented in the keyboard’s firmware rather than at the software level.
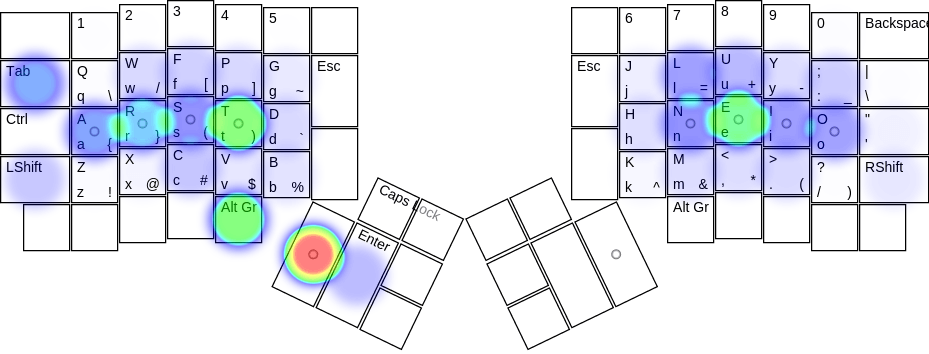
As you can probably tell from the heat map above, the “Alt Gr” key enables the symbol layer, allowing me to type common symbols without my fingers leaving the home row.
What now?
As of today, I’ve only clocked up about an hour of typing with the new layout. I can only manage about 5WPM at the moment so it can be frustrating to use it for any more than a few minutes at a time.
Rather than just trying to use the new layout for my day-to-day tasks, I’ve come up with a plan to help me become productive with it first.
Stage 1 - Touch Typing
Before I do anything else, I need to learn how to touch type with the new layout. At the moment I’m relying on a printed guide, which I constantly refer to in order to find the keys I want. To learn how to touch type, I’m going back to basics:
The quick brown fox jumps over the lazy fox.
The quick brown fox jumps over the lazy fox.
The quick brown fox jumps over the lazy fox.
In theory, the more I use each key, the less I’ll have to look at my guide.
Stage 2 - Speed
Once I’m familiar enough with the layout, I’ll need to get my speed up. There are plenty of tools available online which give you a list of randomly-chosen words to type, and report your speed at the end. I’ve found that 10FastFingers is good enough for my needs. Hopefully doing this for a week or two will get me typing at least 60WPM again.
Stage 3 - Programming
I spend a lot of my waking life programming, so I’ll need to become proficient with this new layout in a programming context. Up until this point I will have been typing mostly English words and some symbols on the new layout, so I’ll need some practice programming before I’m ready to use this layout for my day-to-day work.
At the same time I will be continuing to use the typing speed tools and hopefully get closer to 100WPM.
Stage 4 - Shortcuts
Once I’ve reached my 100WPM goal and feel comfortable enough using the new layout in a programming context, I’ll start using the new layout at work. The final step to fully converting to the new layout will be to re-learn all of the keyboard shortcuts which are currently part of my muscle memory on a QWERTY layout.